The Vault
Castlevania Gaiden: The Game
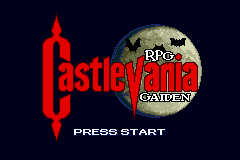
The proposed title screen for Castlevania RPG Gaiden.
Originally, Castlevania Gaiden was planned as a two-part feature. There would have been the comic series (which was published as planned), but there would have also been a playable home-brew game that would have been released (for free) to go along with the game. Each version would tell a slightly different (although still similar) story about Alec and Darkmoon as they ventured to Castle Dracula to defeat the Dark Prince (Dracula, of course), who had been running around the countryside killing barmaids.
Unfortunately, the game never happened. The original programmer dropped out of the project, and without anyone else to assist in the creation of the game, I was forced to drop the idea (and since it's been years since there was any development on the game, there's little point in trying to start it back up now -- Gaiden was published so long ago that it would just be better to find a new story to tell). What's left is a collection of ideas which I will archive here.
Please note, though, that the original planning documents for the game were lost in a computer reformat a while ago (as was the only working demo of the game, an amusing little battle between Darkmoon and Dracula). If any of my files from the planning stages turn up, I'll add them in here (as well as the lost demo, if it ever surfaces). Until then, this is the most complete archive of the game that exists.
Introduction:
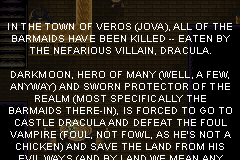
Introductory story scroll for Castlevania RPG Gaiden.
We open on a tavern. Darkmoon has just wandered in to find all the barmaid slaughtered (all of them slumped over, like dead characters in Chrono Trigger, since we would have been using those sprites). A (purposefully) over-wrought text scroll would have come up, stating:
In the town of Veros (Jova), all of the barmaids have been killed -- eaten by the nefarious villain, Dracula. Darkmoon, hero of many (well, a few, anyway) and sworn protector of the realm (most specifically the barmaids there-in), is forced to go to Castle Dracula and defeat the foul vampire (foul, not fowl, as he's not a chicken) and save the land from his evil ways (and by land we mean any barmaids in training, apprentices and such). With the help of his companion, Alec, the two heroes venture to the dark castle (but not The Dark Castle, which is a different fortress and unrelated to this story) to right wrongs and so forth and so on...
We would then start off in the town square. From here you could go to each of the various houses and talk to your other companions from the CVRPG comic:
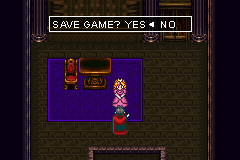
Would you like to save your game?
- Princess would offer advice on upcoming levels, such as hints to key placement, or basic strategies for bosses. She would also allow you to save your game.
- Katrina would man her workshop, allowing players to switch on and off basic options, such as costume color (i.e., Alec and his basic green, red, blue, and purple outfits) or damage numbers appearing over enemies. Any special options you unlock by finding hidden areas (and defeating the bosses there-in) could be turned on and off here as well.
- Angel, meanwhile, would offer to join your group, but if you clicked on "yes" for his offer, though, he'd say something like, "awesome... just, give me a couple. I have a big date tonight," or, "oh, I would, but I hyper-extended by wrist. Maybe next time." That said, if you click "no", he says things like "well, fine! No need to be a dick about it," or "well maybe I won't let you join my party then!"
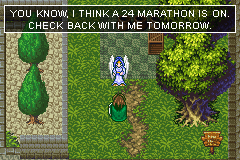
A new party member has joined... or not.
If you visit the village tavern, you'd find the playable characters standing around, drinking. Talking to one of them gives you the option to switch your character.
It should be noted that Golem was not planned for this game, as he had been officially introduced in the comic during the course of planning. Theoretically, if the game had happened, he could have been added in later, at least as someone hanging out around town (there's no reason newer versions of the game, with more features, couldn't have been developed).
Playable Characters:
Four characters in total were originally planned for the game -- two main characters, and two secret ones. Each character would play differently, both in their basic speed, strength, and magic power, as well in what special attacks they could use.
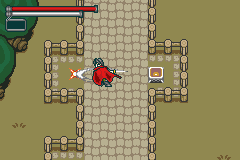
Kill that torch, Darkmoon.
Bear in mind, when originally planned, CVRPG II hadn't even started yet (since we knew the game would probably take a while to make -- if only we knew the irony of that at the time), so two of the secret characters are from the original CVRPG and Year One arcs, and thus would be non-continuity for CVRPG Gaiden (at least, in comparison to the comic series).
Darkmoon and Alec are our starting heroes. Each can use their primary attack (saber for Darkmoon, sword for Alec), and they both can power up their secondary attacks. However, as with the Castlevania series, switching special attacks drops the old attack, and the new attack starts back at level one (no matter what level the previous attack was at), and will then have to be powered up again.
- Darkmoon: Our favorite vampire with a soul. Darkmoon is one of two starting characters (and the one all players start as at the beginning of the game). Darkmoon is quick, but his physical attacks -- his saber -- are weaker. What he lacks in strength, though, he makes up in his diversity of special attacks:
- Fireball: A single burst of flame that travels slowly in line from the caster. Can be powered up to launch three fireballs (two of them spitting out at 45 degree angles from the character's front) or five fireballs (two more spit out at 90 degrees). Uses a lot of magics, but does the most damage of Darkmoon's attacks.
- Ice Shard: A quick, weak dagger of ice launches out in a line from the caster. When powered up, the caster can launch the shards faster. Fully powered, the ice even has a chance to freeze enemies for a brief time.
- Dark Shield: An aura appears around Darkmoon, protecting him from projectiles. Can also damage enemies that touch the shield. Best used in quick bursts, though, as it can quickly drain the magic meter. Powered up versions will drain the magic slightly slower, but damage inflicted does not increase.
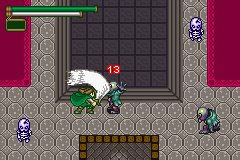
Alec vs. a zombie.
- Alec: The best paladin in the land. Alec is a stronger warrior than Darkmoon, but he is also slightly slower. Alec doesn't have the diversity of attacks that Darkmoon does, but his magic meter is not drained as quickly, either. Additionally, along with his primary attack -- his sword -- Alec also has a shield, which he will automatically hold in front if he's not walking or attacking (just standing still). Alec's shield can block some weaker projectile attacks.
- Dagger: Alec throws a dagger, quickly, at the enemy in front of him (in a line). Powered up, Alec can gain the ability to throw more daggers at once (up the three, quickly, if the button is held down and Alec is far enough away from an enemy).
- Light Orb: Alec casts a single, tiny orb of light that travels, slowly, in a line away from him (a lot like Darkmoon's fireballs). Powered up, Alec still can only cast one at a time, but the orb gets bigger, and can cause more damage.
- Light Beam: Alec casts a laser-like beam in front of him. Can be held down for persistent damage (although this drains his magic meter faster). When powered up, the beam will cause more damage (although the drain on the meter remains the same).
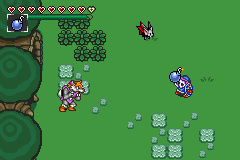
Dead Link, secret hero of Castlevania RPG Gaiden.
- Dead Link: Hero of Hyrule, although now a skinless skeleton. Dead Link can be unlocked for play by exploring Dracula's castle. Link is slower than Alec, but stronger with his Master Sword. And, like Alec, he has a shield he can use to block weaker projectiles. Unfortunately, he doesn't have any powerful magic attacks -- he's limited to the items every Link has instead. Additionally, he cannot power up his special attacks.
- Boomerang: Link throws his classic boomerang, which travels half the screen in a line before coming back to him. If he's moving, though, the boomerang will travel in a circular arc. The boomerang isn't super quick (although it's faster than Darkmoon's fireball), and it has a small chance to stun damaged enemies.
- Arrows: Link can fire off arrows from his magic bow. These arrows are weaker than his main attack, but are much quicker (speed and damage-wise, they're about on par with Alec's daggers). As a bonus, if Link fires the arrows through a torch (or kills a fire enemy with one), the arrows will catch fire and continue flying along their line).
- Bombs: Link can drop bombs. These are very powerful, but they also take a few seconds to explode. Dropped bombs can be picked up and thrown -- just make sure to throw the bomb, as you can take damage from bombs.
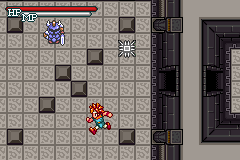
Crono, secret hero of Castlevania RPG Gaiden.
- Crono: The silent swordsman. Crono is the strongest and the fastest of the playable characters, and his primary attack -- his saber -- is especially lethal. Unfortunately, Crono also doesn't have access to special powers. Instead, he is able to use his magic meter to unleash powered-up saber attacks. As the magic meter refills, a different saber attack is used (upon the button press) based upon how much magic is in the meter. The full meter is consumed, and begins to refill all over again. Bear in mind, Crono's meter refills the slowest of all the heroes, so it will take time for Crono to be able to use his most powerful attacks.
- Critical Strike: At less than a quarter full, Crono will attack with his saber, and then sweep it back a second time (a la his basic critical hit in Chrono Trigger).
- Red Strike: Between a quarter full and half full, Crono will lunge forward, doing damage to all enemies within his strike zone (in appearance, like half of the X-Strike combo he could do with Frog in Chrono Trigger). Be careful with this move, though, as Crono can slide off open ledges.
- Slash: Between half and three-quarters full, Crono will swipe at the ground, sending a sonic wave from his blade in the direction he is facing (a la his Slash move from Crono Trigger, but with a slightly larger area of effect).
- Falcon Strike: When his meter is over three-quarters full, Crono will jump in the air and sweep horizontally across the screen, damaging all enemies he connects with in a broad line from his position. He will then land back where he was beforehand.
- Frenzy: When his meter is full, Crono can unleash a multi-hit combo on the closest enemy to him (based upon the direction he is facing). This will do massive damage to the enemy, and is even powerful enough to kill some of the weaker bosses.
The Castle Beckons:
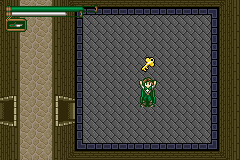
Alec finds a key, allowing him access to the next section of Castle Dracula.
The game plays like a hybrid of Vampire Killer and Zelda. Character wander through (vaguely familiar) sections of Castlevania, laid out in overhead graphics (a la Zelda). As they explore the castle, they will find locked doors that will require keys to open. Each key is hidden somewhere in the preceding section of the castle (unless otherwise noted). To finish out a stage and move on to the next level, the heroes will have to find all five keys in each stage.
Each time a level (not a section of the stage, but the full stage itself) is finished, the players will have the option to go back to the hub level, Veros (Jova), and avail themselves of any features they would like at the town (if an item shop was to have been eventually built into a later build of the game -- possible run by Bucky -- they would have been able to do shopping there). They are then able to go back to the castle itself, or (using Katrina's magic shop) warp to any level they've opened up. This allows players the chance to hit specific stages again and search for any secrets they may have missed.
Along with keys the players can also find (in torches, and possibly from some enemies) hearts, to refill their magic meter, and food, to refill their health (and, if an item shop was to have been included, money as well). Some torches will also drop special attack scrolls (specific to each character). When picked up, these scrolls automatically switch the player to that special attack -- although, if the player already has the attack featured by that scroll, they will power up their attack to the next level (only possible with Darkmoon and Alec).
Welcome to Castle Dracula:
Dracula's castle is broken up into six sections. There are four larger stages, as well as an opening area, and the final level (featuring the confrontation with Dracula). In order of exploration, the stages (including secret levels) are:
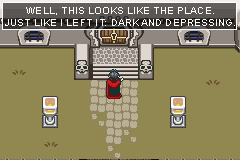
Darkmoon at the castle entrance.
- Castle Entrance: This first, short area features the only place on the castle grounds where the player won't be attacked by enemies (just like in the opening to every Castlevania game). The players can figure out how to control their characters, and break torches to gain the first of their special attacks.
- Courtyard: The first section of the castle features an open expanse of courtyard, along with a small bridge over a dark river. A single hidden key will unlock the doors to Castle Dracula.
- Mad Forest (Hidden Area): Hidden off to the side from the Courtyard, the mad Forest is a two-tiered level. The top level is a maze of trees and logs (a la the Lost Woods from the Legend of Zelda: A Link to the Past). Holes are scattered around the level, and falling into them takes the player to the underside, a dungeon maze. The player would have to navigate both levels of the forest to reach the hidden boss, a Giant Skeleton. Heroes who defeat the Giant Skeleton will receive a great reward...
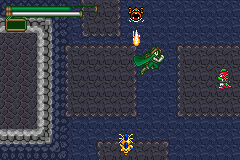
Alec exploring the merman-infested Waterway.
- The Grand Hallway: The great, red-carpeted entrance. Zombies attack from all sides while bats wait to dive-bomb when you least expect it.
- Waterway of the Mermen: As with the classic Grand Hallway, this one, too, leads into an underground area where mermen swim and every jump could be your last (or, at least, very wet).
- Marble Gallery: Leading out from the Grand Hallway, the Marble Gallery presents a maze of statues and paintings to explore. Watch out for imps and armors.
- Outer Wall: Leading up higher into the castle, the Outer Wall stretches out over the cliff-side of the Borgo Pass. Ravens and ghosts fly the towers, sending unwary adventures back down to the levels below.
- Alchemy Lab: From the top of the Outer Wall, the Alchemy Lab presents a workshop full of breakers, deadly experiments run a-muck, and elementals at every turn. Frankie and Mummy guard the final room of the lab, preventing access deeper into the castle until you defeat them.
- The Villa (Hidden Area): Tucked away in the Waterway, a hidden staircase leads upwards into the basement of the Villa. Store rooms of casks and old artwork are defended by vampire servants, while the upper levels of the quarters present a full castle in miniature. In the final sections of the quarters, the bedrooms, the Succubus awaits to battle you and steal your life.
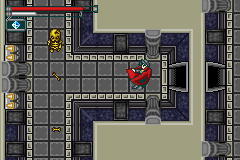
Darkmoon dodges skeletons in the Armory.
- The Inner Halls: After a small descent into the castle, the Inner Halls present the main body of the fortress of evil. The difficulty picks up as the heroes will explore expansive hallways looking for the elusive keys. But be quick, as danger lurks around every corner.
- Long Library: A maze of bookshelves and small studies, the Long Library is haunted by ghosts and lurking armors. Watch out for phantom books that can summon fantastical creatures from their very pages.
- Armory: Full of deadly traps, the Armory is loaded down with swinging maces, slicing blades, and deadly spike traps. A mid-boss, a Giant Armor, prevents access to the locked door beyond.
- Warehouse: This twisting labyrinth of storage rooms. Wooden boxes block many of the paths, requiring the heroes to push the blocks out of the way, but monsters will continue to attack you even while you're navigating the box puzzles.
- Treasury: Richter Belmont's favorite place. The Treasury presents gold plated rooms piled high with treasure. Watch out for the treacherous jumps, though, as the gemstone platforms will give way, plunging you into the deadly depths below.
- Ramparts: After escaping the Treasury, the heroes venture out into the northern-most expanse of the castle. As the moon shines down on the heroes, they'll be attacked by ravens, skeletons, and bone dragons. It's an endurance run to the final sky-walk, where Carmilla will battle you for the right to venture deeper into the dangerous castle.
- Tower of Sorcery (Hidden Level): Deep within the Warehouse a secret entrance leads into the Tower of Sorcery. Floating platforms are guarded by witches and elementals. Making it to the top of the tower will require fast reflexes, but defeating the final guardian, the immortal wizard Shaft, will be even harder.
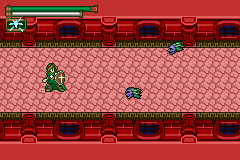
Alec battling Medusa Heads in the Red Level.
- The Chapel: The upper floors of the castle are taken up by the sprawling Chapel, where the unholy creatures of Dracula's castle roam the once-sanctified halls. Unlike the other sections of the castle, the final exit for the Chapel is visible immediately. The heroes will have to venture into the two wings of the unholy church to find four of the keys they'll need to unlock each of the four doors before them. Only then will they face the final boss of the area and exit deeper into the castle.
- Royal Chapel: The main hallway of the Chapel is lined with pews and small altars. Two wings branch off the center of the hallway, leading into two separate areas of the Chapel. Once the heroes have found all four keys to be used at the unholy altar at the end of the Chapel they'll face off against Medusa for the right to move on.
- Chapel (Red Level): The classic "red level", this section of the chapel is a twisting three floored nightmare of quick jumps and spike traps. Watch out for medusa heads and spear armors.
- Long Cathedral: The upper section of this wing presents a long cathedral. Although only a single long hallway, the heroes will have to navigate small rooms off the sides in the appropriate order or face a hallway that never ends. A mid-boss, a Giant Skull, defends the last section of the Cathedral.
- Bell Tower: Leading upwards from the other wing of the Chapel, the heroes will have to navigate rising platforms and jump from bell to bell, all while being attacked by bats, ravens, and ghosts.
- Sky Chambers: The upper section of the Bell Tower presents a twisting series of open-air rooms. The heroes will be constantly under attack from a Wyvern throughout the rooms.
- Olrox's Quarters (Hidden Area): Branching off from the Bell Tower, Olrox's Chambers presents a series of hallways and rooms defended by armors and winged birdmen. The central section of the Quarters is a fountain garden protected by mermen and creeping vines. Leading back across the top of the Quarters, Olrox's room butts up against the giant stained glass expanse of the Chapel. Defeating Olrox will earn the heroes great glory, but the vampire lord may be more than the heroes can handle.
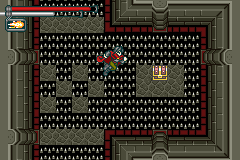
Darkmoon being greedy in the Dungeons.
- The Dungeons: A long drop from the Chapel takes players deep into the bowels of the castle. Traps await in the dark stone corridors, and the toughest monsters yet lurk behind every door.
- The Crypt: Dark stone walls surround dirt floors. Coffins line every room. The heroes will have to venture through these halls as monsters rise from their graves (and the very dirt of the floors) attacking seemingly at random. Watch your step.
- The Dungeons: The stone walls feel ever closer as tight hallways leads to trap-filled rooms. Spikes will pop out from walls, blades slice through the air, and steep drops await one wrong jump. The way out is guarded by the Grave Revenant, a super fast, super strong zombie.
- The Arena: Unlike other parts of the castle, the Arena is a simple set of four rooms, each with a mid-boss. Defeating all four mid-bosses will reveal the key for forward progress. Of course, you have to defeat the guardians: Cyclops, the Mummies, Armor Lord, and Igor.
- Bloody Aqueduct: Leading out from the Arena, the Aqueduct washes through the ruins of Dracula's previous castles. Water-filled passageways lead through rooms filled with traps. Mermen and ghosts will strike from every direction. The way out is guarded by a mid-boss, the Bone Dragon King.
- Clock Tower: The classic Castlevania level, the Clock Tower features spinning gears and moving platforms. Treacherous jumps are guarded by skeleton knights, and Medusa heads breeze through the air, looking to make each leap your last. At the top of the tower, Death awaits, ready to reap your soul for his collection.
- Cursed Prison (Hidden Area): Hidden deep in the dungeons, the Cursed Prison is a set of long, dark stone hallways. The ghosts of forgotten prisoners lurk the passageways, and bone dragons guards the doors. Players will have to best a mid-boss, the Bat Company, to venture deeper into the Prison, all to face against a final foe: the vampire prince, Blacula.
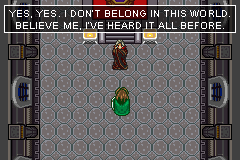
Dracula has been expecting you (obviously).
- The Castle Keep: The long journey to Dracula's chamber is nearly at an end. Just one more more battle, and you will stand victorious.
- Final Climb: A long staircase leads up to the last hallway. Torches line the hall, allowing the players one last chance to fill up their magic and energy. The only foes to worry about are the occasional bat, and players don't even have to find a key. All that is left is the last battle.
- Dracula's Chambers: The great Castle Keep is the home of Dracula's throne room. The moon shines through the windows while you battle the Dark Prince to save the land (and strike a blow for barmaids everywhere).
The Bosses:
The Mid-Bosses:
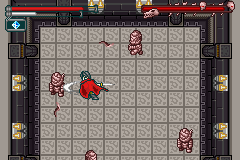
Darkmoon battles the Mummies.
- Giant Armor: A slow, lumbering boss, the Giant Armor will pursue the hero around the room, occasionally swinging his axe. Players can jump the axe attack, if they time it right, but watch out, because sometimes the armor will swing it twice in a row. Timing is everything.
- Giant Skull: A large skull that floats around the room. Although not terribly difficult to avoid, the giant skill will spawn smaller, floating skulls. It will also, occasionally, chomp it's jaw twice and dash-float towards the player.
- Wyvern: A giant, flying beast, this mid-boss attacks (effectively) a lot like the Giant Skull, only faster. The Wyvern will pursue, occasionally dive-bombing them. It can also breath fireballs at the player. The Wyvern will also drop eggs. If the eggs are not immediately destroyed, they will hatch into tiny dragonettes, and these will also have to be killed.
- Grave Revenant: A very fast zombie, the grave Revanant will run around the room, picking up any items and throwing them at the player. It can also dash at the player, lashing out two or three times (varies), punching and kicking before dashing off again.
- Cyclops: Like the Giant Armor, but stronger. The cyclops will pursue the player around the room, swinging his hammer. The hammer swings can be dodged, buy be careful, as the Cyclops will sometimes swing the hammer an additional one or two times in succession.
- The Mummies: Four mummies will march around the room, occasionally throwing bandages. Each mummy is a separate monster, so each can be killed in turn. Bear in mind, though, that as the mummies are defeated, the remaining mummies will get faster, until the last one is super-quick.
- Armor Lord: A very fast, very strong Giant Armor. The Armor Lord will march after the player, swinging his sword two or three times. The Armor Lord, however, has a shield, blocking all frontal attacks. The only way to defeat him is to get in close while he's swinging his axe and attack from behind.
- Igor: A quick and feisty baddie, the little Igor is a hopping fiend. Igor will leap around the room, quickly striking the player before jumping off again. Quick dodges and fast attacks are the only way to survive this encounter.
- Bone Dragon King: A large bone dragon, the Bone Dragon King is attached to the far wall of the room. His serpentine body weaves back and forth from a fixed point. The only weak spot is his head. The King will spit fireballs, and every part of him can physically injure the heroes.
The Hidden Mid-Boss:
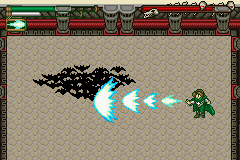
Alec takes on the Bat Company.
- Bat Company: Upon entering the room, the players will be confronted by a swarming group of bats. This Bat Company will take different shapes -- a giant bat (that will dive bomb players), a giant skull (which will shoot fireballs at the players), and an axe (that will swing at the players). The Bat Company is a collective, so you can't kill portions of it -- it has one, shared energy meter.
The Main Bosses:
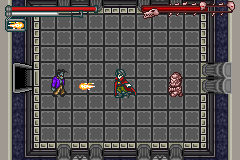
Darkmoon fights Frankenstein's Creature, but the Mummy lurches closer.
- Frankie and Mummy: Frankie will wander back and forth around the room, occasionally ground-pounding with his fist, which will cause rocks to fall from the ceiling (which can damage the player). Meanwhile, Mummy will constantly pursue the player, attempting to physically damage them (by touching them). Only Frankie can be hurt -- attacking Mummy will not kill him, but it will temporarily slow him down for a few seconds. Once Frankie is defeated, the Mummy is automatically defeated as well.
- Carmilla: Carmilla will appear somewhere in the room, and send her small mask flying out in an expanding circular path. Then, she will transform into her cat form and run somewhere else to repeat the process. She can be attacked in either form, but her cat form is weaker. However, touching her cat form will cause the players heavier damage than the mask can inflict.
- Medusa: Medusa will slither around the room, attempting to strike the player with her sword. She can deflect some attacks with her shield, as well, but she doesn't always have it out (and blocking causes her to pause for a couple of seconds). Watch out, though, as Medusa will spawn little snakes that will pursue the player. Touching those will stone the player, forcing the players to pause for a few seconds.
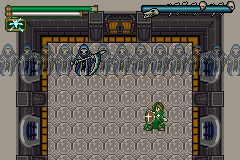
Alec does not fear the Reaper (or the song).
- Death: Upon entrance to the room, Death will materialize in horizontally (with faded sprites coalescing into a single, solid sprite of Death). Death will then fly around the room, lashing out with his scythe while smaller sickles will appear and home in on the player. Death will then transport out and back in randomly and continue his attack pattern.
- Dracula: Dracula's battle will proceed in two phases. In part one, Dracula will teleport randomly around the room, unleashing either an expanding circle of flaming bats or three slow moving fireballs. The fireballs can be deflected with a regular attack, but the bats will have to be dodged. Once weak enough, Dracula will teleport twice more, unleashing a homing blue orb each time -- if the player attacks the orb before the orb touches them, they will regain some of their health (through meat). In his second phase, Dracula will take on a more skeletal appearance. He will continue teleporting around the room, unleashing faster bats and clusters of five fireballs. He will also occasionally shoot out a bolt of lightning, which will do devastating damage to the players.
The Hidden Bosses:
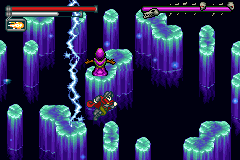
Darkmoon battles the hidden boss, the sorcerer Shaft.
- Giant Skeleton: The Giant Skeleton is the easiest of all the bosses in the game (which makes sense, since he can also be fought first). The Giant Skeleton will jump into the boss room, dive bombing the players. He will then pause for a couple of seconds, and then jump out. The process will then repeat.
- Succubus: Succubus will march around her room, attacking nearby players with her wing-tentacles. She will also teleport herself randomly. From time to time she can also unleash a dark portal which will draw in the players and do devastating damage (unless they are able to stay far enough away and run from it).
- Shaft: Shaft will attack with one of five elements: one fireball, three quick moving ice shards, a lightning bolt, two slow moving dark orbs, or three falling rocks. He will teleport around the room, unleashing magic at the players until defeated.
- Olrox: Olrox will dash around the room, spraying out lightning bolts at players that get too close. For long range attacks, he will unleash slow moving floating skulls that will home in on the player. The weaker Olrox gets, the more skulls he will continue to summon. The skulls can be defeated, but they take multiple hits.
- Blacula: Blacula's battle is quite similar to Dracula's, although his powers differ. Blacula will teleport around the room, unleashing a circle of fire balls that, after circling Blacula, will coalesce into a single, fast-moving fireball. This fireball can be deflected with regular attacks, but it may prove easier simply to try and dodge it. Once weakened enough, Blacula will start alternating between his fire circle and a set of three lightning-orbs, which will fly out from Blacula (and cannot be deflected).
The End and More:
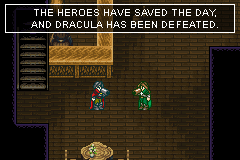
Darkmoon and Alec enjoy a couple of tall, frosty pints.
Upon completion of the game, if the players did not fight any of the secret bosses, they will rewarded with the "bad" ending. If they do fight any (or all) of the secret bosses, they will get the "good" ending. Either way, they will also unlock the Second Quest Mode, which features keys in different places and more difficult boss battles. Both versions of the game (first and second quest) have hidden bonuses to find (by defeating all the secret bosses), and if all secret bosses are defeated in both versions of the game, players will be rewarded with the "best" ending.
- Bad Ending: The heroes have saved the day, and Dracula has been defeated. The heroes watch as the castle falls into the sea, and then go to have a nice pint back at the town. However, upon getting there they are attacked by the vampire barmaids, and are themselves defeated. The last shot is of Dracula's bat-soul once again rising from his grave.
- Good Ending: The heroes have saved the day, and Dracula has been defeated. The heroes watch as the castle falls into the sea, and then go to have a nice pint back at the town. There the heroes debate baying the bar and setting up permanent residence in town. All is well with the world... except, in the last shot, Dracula's bat soul is seen once again rising from his grave.
- Best Ending: The heroes have saved the day, and Dracula has been defeated. The heroes watch as the castle falls into the sea, and then go to have a nice pint back at the town. In town, all four heroes (Darkmoon, Alec, Link, and Crono) get the endings they've always dreamed of. Katrina offers to be Darkmoon's barmaid, although only for a night. Princess drags Alec off to do really nasty (but fun) things to him. Dead Link is made into a real boy! And Crono runs for Village Elder and wins by silent majority. The last shot is of Dracula's grave, with the text "and the Dark Lord did not ever rise again... probably."
Second Quest Bosses:
Of course, to get the "best" ending, the players will have to explore a slightly different version of the castle, find new keys, and beat harder versions of all the bosses. Although the mid-bosses do not get new attacks (all basic monsters and mid-bosses will take more hits to defeat, though), the five big bosses and five secrets bosses will all gain greatly improved attacks patterns (and sometimes second forms).
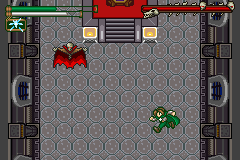
Alec battles the Dracula Shade in the Second Quest.
- Frankie and Mummy: As before, Frankie will wander back and forth around the room, occasionally ground-pounding with his fist, which will cause rocks to fall from the ceiling. He will also now occasionally throw out a beaker of fluid which will either spawn standing fire on the floor (which lasts for quite a number of seconds) or will spawn a second (weaker) Frankie that will home in on the players (but can be defeated). Meanwhile, Mummy will still pursue the player, attempting to physically damage them (by touching them). He will also throw out bandages that the player has to dodge. As before, only Frankie can be hurt -- attacking Mummy will not kill him, nor will it even slow him down. Once Frankie is defeated, the Mummy is automatically defeated as well.
- Carmilla: Carmilla will appear somewhere in the room, and send two small masks flying out in expanding circular paths. Then, she will transform into her cat form and run somewhere else to repeat the process. She can be attacked in either form, but her cat form is weaker. However, touching her cat form will cause the players heavier damage than the mask can inflict. Once she has been defeated in this form, her energy meter will refill and she will transform into her demon phase (with the giant floating mask). She will then float around the room, spawning fireballs while her mask drips acid on the floor.
- Medusa: Medusa will slither around the room, attempting to strike the player with her sword. She can deflect some attacks with her shield, as well, but blocking causes her to pause for a couple of seconds, leaving her vulnerable for a quick rear attack. Watch out, though, as Medusa will spawn little snakes that will pursue the player. Touching those will stone the player, forcing the players to pause for a few seconds. Once she has been defeated in this form, her energy meter will refill, and Medusa will transform into the giant floating medusa head. She will float around the room, causing lots of damage if she's touched. She will also summon smaller medusa heads that will fly randomly around the room.
- Death: Upon entrance to the room, Death will materialize in horizontally (with faded sprites coalescing into a single, solid sprite of Death). Death will then fly around the room, lashing out with his scythe while smaller sickles will appear and home in on the player. Death will then transport out and back in randomly and continue attack his pattern. Once he is defeated in this form, Death will transform into his teal robes. He will continue his pattern as before, but he can also shoot out spikes from the eight cardinal directions. He can also teleport as normal, but suddenly pause in his teleport and attack with his scythe before warping out.
- Dracula: Dracula's battle will proceed in three phases. In part one, Dracula will teleport randomly around the room, unleashing either an expanding circle of flaming bats or three fireballs. The fireballs can be deflected with a regular attack, but the bats will have to be dodged. Once weak enough, Dracula will teleport once more, unleashing a homing blue orb (which the player can attack for meat). In his second phase, Dracula will take on a more skeletal appearance. He will continue teleporting around the room, unleashing faster bats and clusters of five fireballs. He will also occasionally shoot out a bolt of lightning, which will do devastating damage to the players. Once he is defeated in this form, Dracula's energy meter will refill and Dracula will become a Shade. The Shade will fly around the room, shooting fireballs and summoning homing bats and swooping bone dragons. He will also dive bomb the players.
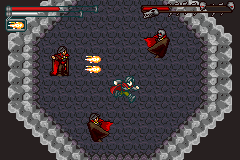
Darkmoon takes on Blacula (and his clones) in the Second Quest.
- Giant Skeleton: The only change to the Giant Skeleton's attacks is that he will move faster. The Giant Skeleton will jump into the boss room, dive bombing the players. He will then briefly pause before jumping out. The process will then repeat.
- Succubus: As before Succubus will march around her room, attacking nearby players with her wing-tentacles. She will also teleport herself randomly. From time to time she will also unleash a dark portal which will draw in the players and do devastating damage (unless they are able to stay far enough away and run from it). When she gets down to half energy, she will begin to summon two dark portals at a time, making it harder for the players to avoid the attacks.
- Shaft: Shaft will attack with one of five elements: one fireball, three quick moving ice shards, a lightning bolt, two dark orbs, or three falling rocks. He will teleport around the room, unleashing magic at the players. Once he is defeated in this form, his energy meter will refill and Shaft will transform into a ghost. He will summon six orbs (one for each of the elements, including Light), and these orbs will have to be attacked to defeat Shaft. When each orb is attacked, the orb will unleash Shaft's magical attack. The Light orb, though, will heal all the other orbs when attacked. Once an orb is defeated, it will not come back, except for the Light orb, which will respawn once three other orbs have been defeated. The players will have to attack the orbs, though, because if they wait too long, the orbs will attack on their own (with a pattern of three attacks from three random orbs, and then a healing spell from the Light orb).
- Olrox: Olrox will dash around the room, spraying out lightning bolts at players that get too close. For long range attacks, he will unleash slow moving floating skulls that will home in on the player. The weaker Olrox gets, the more skulls he will continue to summon. The skulls can be defeated, but they take multiple hits. Olrox can also transform into a bat and fly around the room, spawning more bats that will fly at the player.
- Blacula: Blacula's battle starts quite similar to Dracula's. Blacula will teleport around the room, unleashing a circle of fire balls that, after circling Blacula, will coalesce into two, fast-moving fireballs. These fireballs can be deflected with regular attacks, but it may prove easier simply to try and dodge them. Once weakened enough, Blacula will start alternating between his fire circle and a set of five lightning-orbs, which will fly out from Blacula (and cannot be deflected). When defeated in this form, his energy meter will refill and Blacula will take on a skeletal appearance. He will then summon a second (normal looking) version of himself, and the two will proceed to move around the room in the same pattern as before. When very weak, Blacula will summon a third copy of himself to continue the onslaught. Only the skeletal Blacula can be damaged.
Hidden Rewards:
Aside from the "best" ending, players will also receive bonuses for defeating all of the hidden bosses (in both forms).
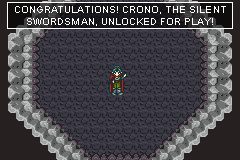
Darkmoon unlocks Crono for use in the game.
- First Playthrough:
- Defeating the Giant Skeleton will unlock Dead Link for play in the game.
- Defeating the Succubus will unlock Darkmoon's alternate outfit, Evil Darkmoon (which can be toggled on or off at Katrina's spell shop).
- Defeating Shaft will unlock Alec's alternate outfit, Armored Alec (which can be toggled on or off at Katrina's spell shop).
- Defeating Olrox will unlock the ability to switch special attacks out at Katrina's spell shop (so that you can have any of the special attacks you want when entering a level).
- Defeating Blacula will unlock Crono for play in the game.
- Second Playthrough:
- Defeating the Giant Skeleton will unlock Dead Link's alternate outfit, Zombie Link (which can be toggled on or off at Katrina's spell shop).
- Defeating the Succubus will unlock slow health regeneration (which can be toggled on or off at Katrina's spell shop).
- Defeating Shaft will unlock faster magic regeneration (which can be toggled on or off at Katrina's spell shop).
- Defeating Blacula will unlock the Rainbow sword for Crono, which improves his attack speed and magic regeneration (sword can be toggled on or off at Katrina's spell shop).
Alternate Outfits:
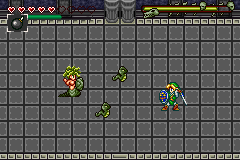
Zombie Link takes on Medusa.
- Darkmoon's outfit, Evil Darkmoon, increases Darkmoon's secondary attack power. It also greatly buffs his magic regeneration. Evil Darkmoon, however, has a weaker defense, and his primary attack (the sword) does less damage. Evil Darkmoon is very much a mage character.
- Alec's outfit, Armored Alec, increases Alec's primary attack power. It also greatly buffs his defense, and grants minor health regeneration. However, Armored Alec's secondary attacks are weaker, and his magic refills slower than regular Alec. This outfit makes Alec into a very powerful fighter.
- Dead Link's outfit, Zombie Link, grants Link drastically improved magic regen and much stronger primary and secondary attacks. However, due to the fact that he's now a slowly rotting corpse, Zombie Link has to feed on the life force of enemies to live. His energy meter will slowly empty unless he kills enemies (this includes defeating any of the weaker secondary attacks from bosses) -- killing enemies slightly refills the meter. As a bonus for Zombie Link, though, he gets an improved shield, which can block almost all projectile attacks (except for some powerful boss spells).
Final Thoughts:
And there you have it: the proposed Castlevania RPG Gaiden game. As cool as it would have been to see this, it was just never meant to be. Without an engine, the game just never could get off the ground, even if most of the sprites would be easy to either collect together or finish editing (from existing CVRPG sheets). But the engine for the game is, like 75% of the work involved.
Sure, someone could come along and offer to make an engine for it, but let's be honest -- if I thought that was likely, I probably wouldn't be publishing the complete notes for the proposed game. We'll just think fondly on what could have been, and move on to other projects.
